|
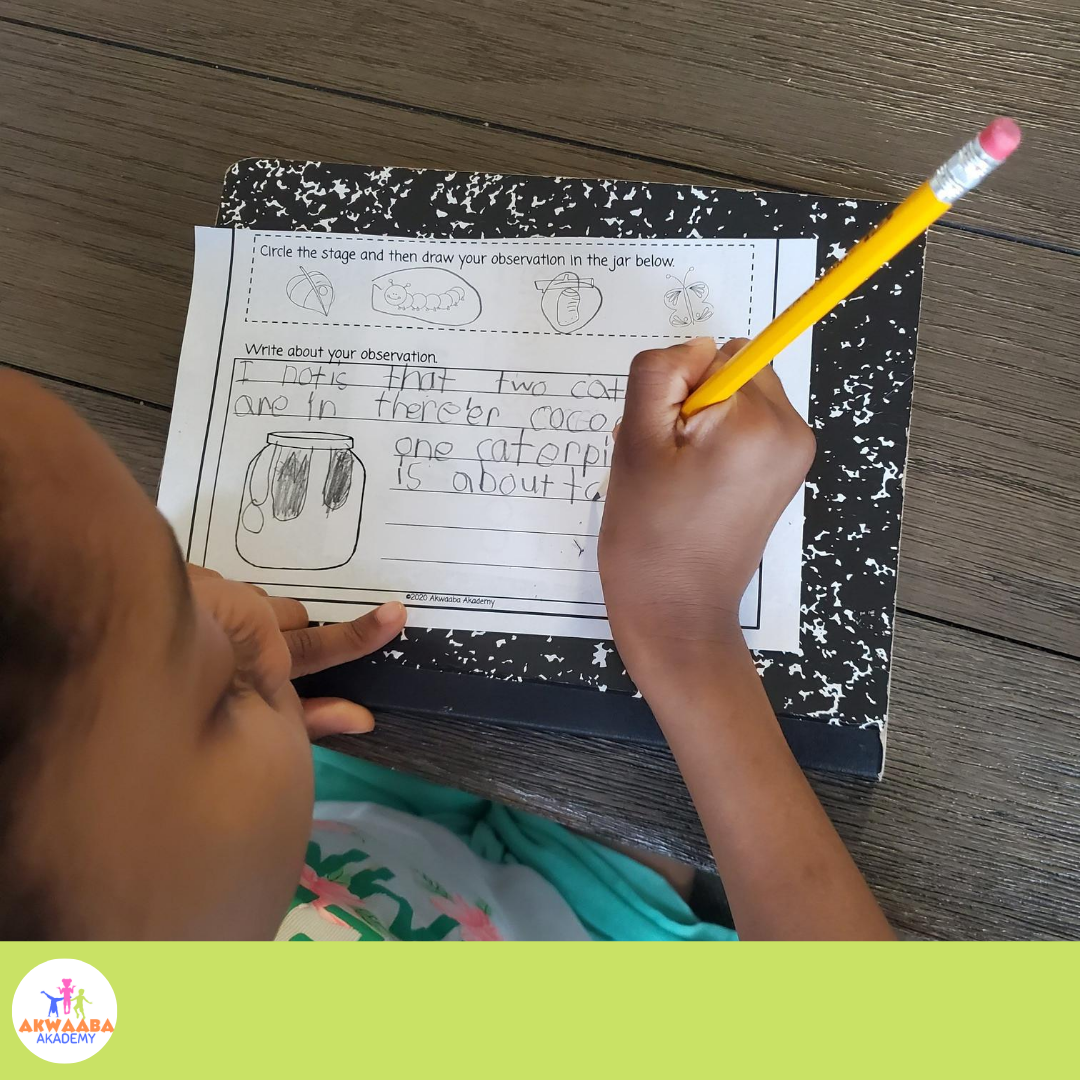
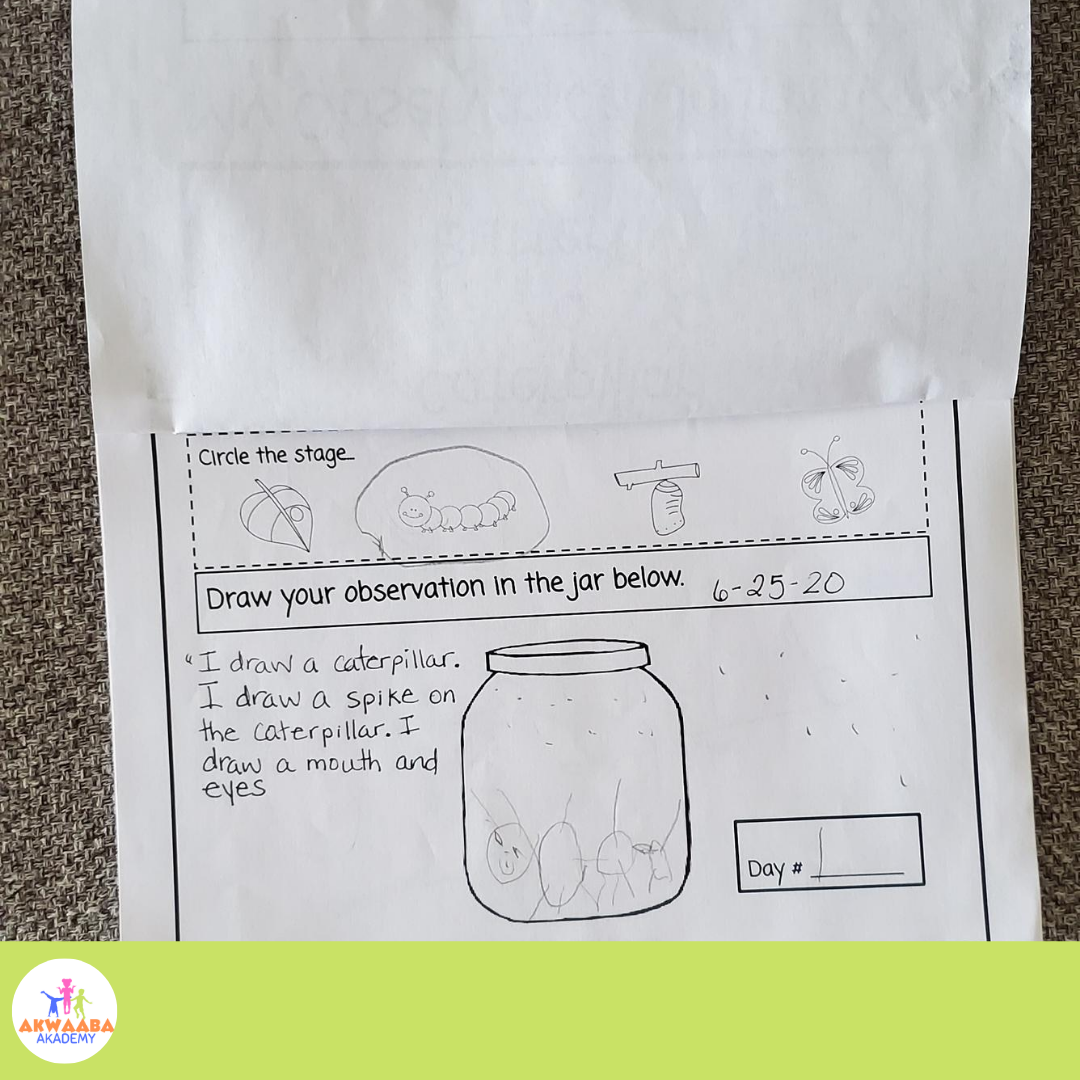
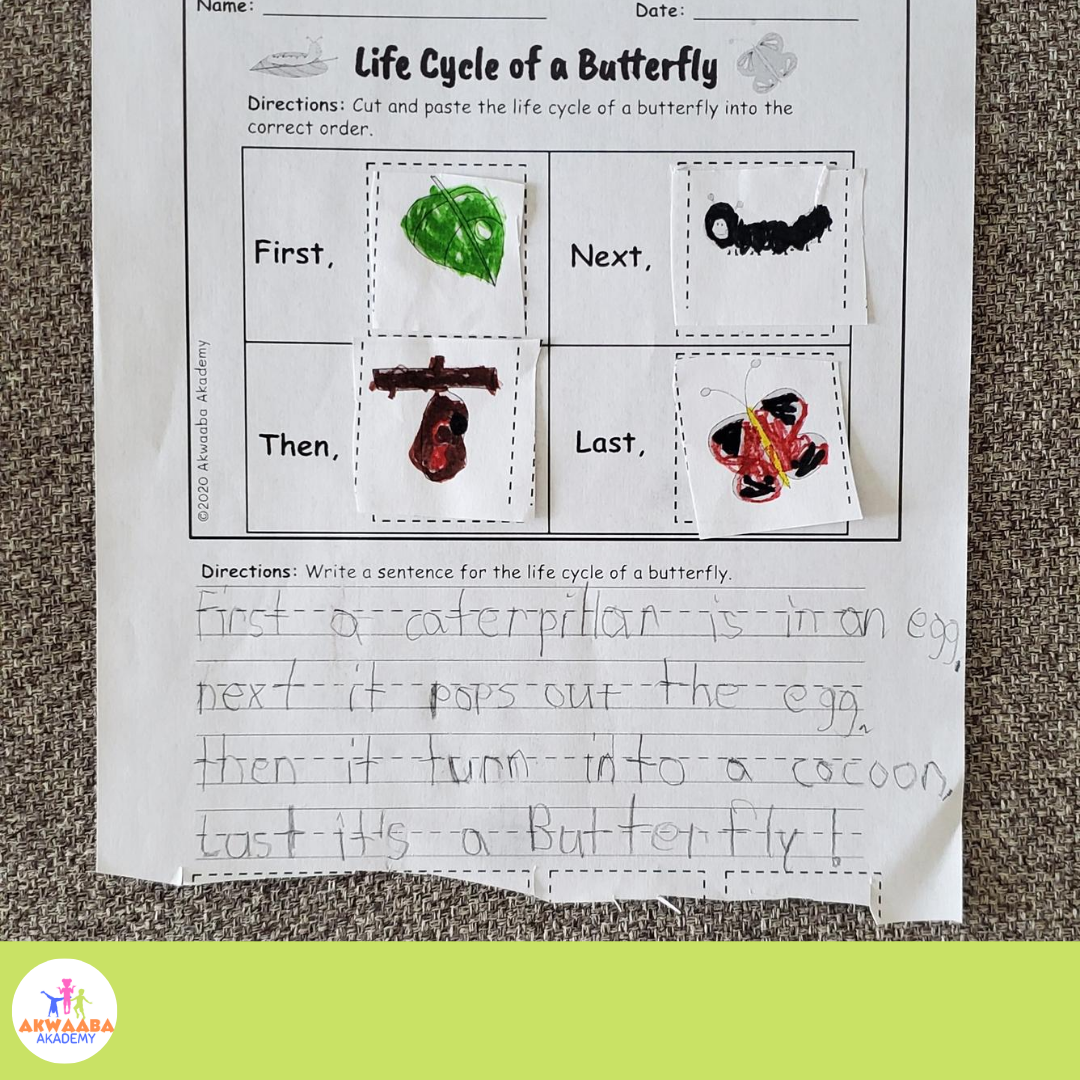
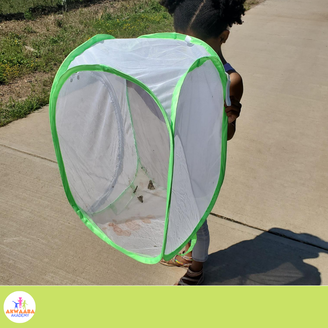
Disclosure: Some of the links below are affiliate links, meaning, at no additional cost to you, I will earn a commission if you click through and make a purchase. Summer is in the air and so are butterflies. Don’t you just love seeing a butterfly flutter by as you stroll to your destination? My children love trying to catch them, but those flutters are too quick for their little hands. I thought to myself, why not order caterpillars so they can see the changes of a butterfly’s life cycle. They were already familiar with the life cycle of a butterfly from the very popular children’s book, The Very Hungry Caterpillar by Eric Carle about a caterpillar who ate too much and then transformed into a beautiful butterfly. We have read the book so many times that they have memorized the story. So, I made the decision to order the Insect Lore Butterfly Garden kit as a surprise, and boy were they surprised when the package arrived. 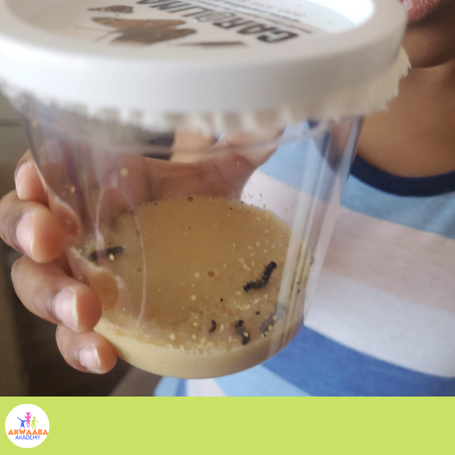 Before the package arrived, I knew I wanted them to document the transformation from day one to the very end. What better way than a caterpillar to butterfly life cycle journal? I set out to make just the journals, but in the end, I made several relatable worksheets to go along with the caterpillars transformation. There are two versions of the journal because my children are 4 and 6 years old, and developmentally, they aren’t able to do the same things. Both have a jar to draw their observations, circle a picture to indicate what they see, and label which observation day it is. My daughter is capable of writing sentences, therefore I included lines for her to write about her observations and drawings. My son provided a dictation about his drawing which I wrote in his journal. What I liked most about having the journals was watching my children go back to the previous pages to look at their drawings to see the changes and having meaningful conversations with each other.
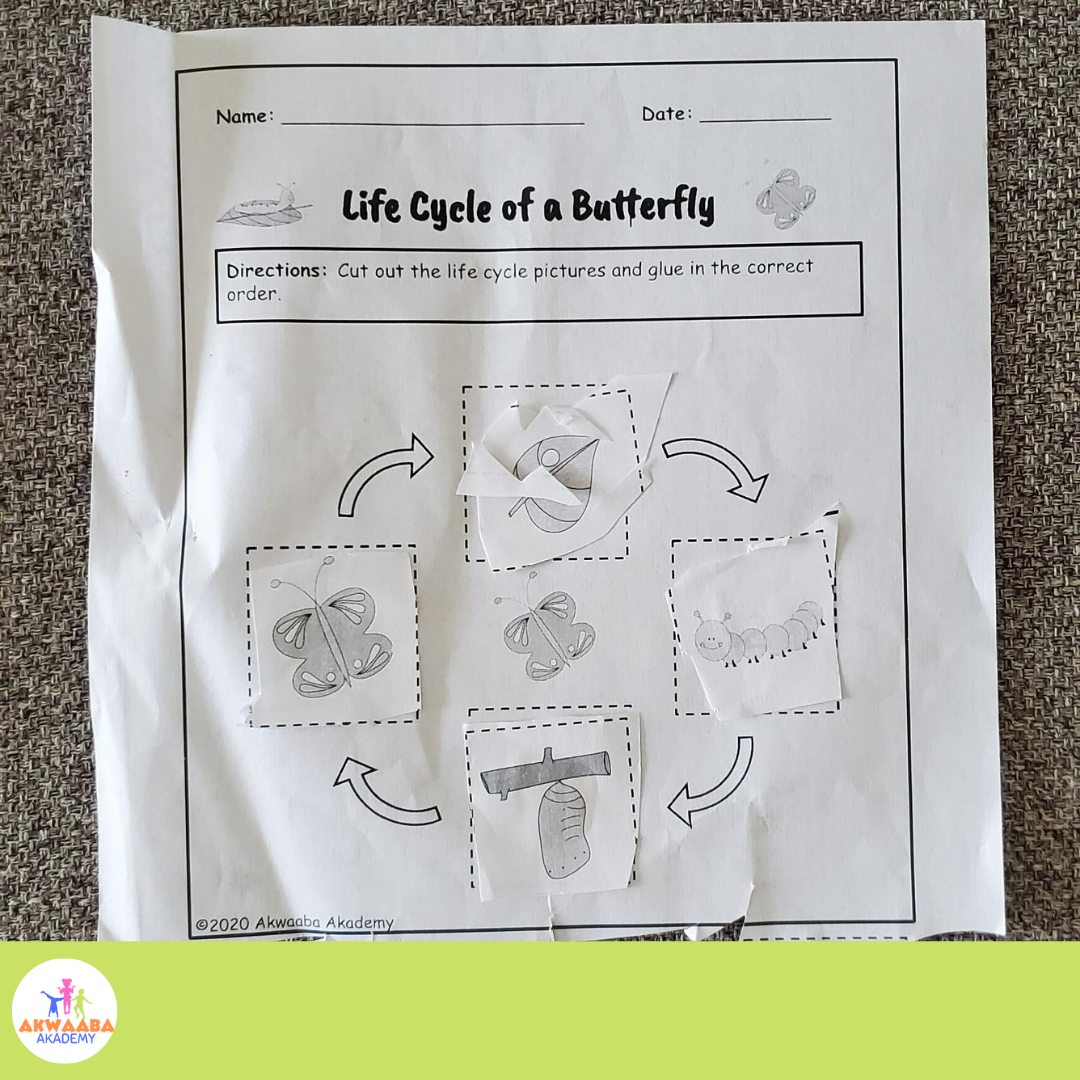
They used these cut and paste worksheets was after the caterpillars turned into butterflies. The focus was to recall what happened and in the correct order. In addition, it provided an opportunity for my children to work on their scissors skills. I try my best to incorporate some type of fine motor activity when I do activities with them. My daughter's has sequence words and space to write sentences.
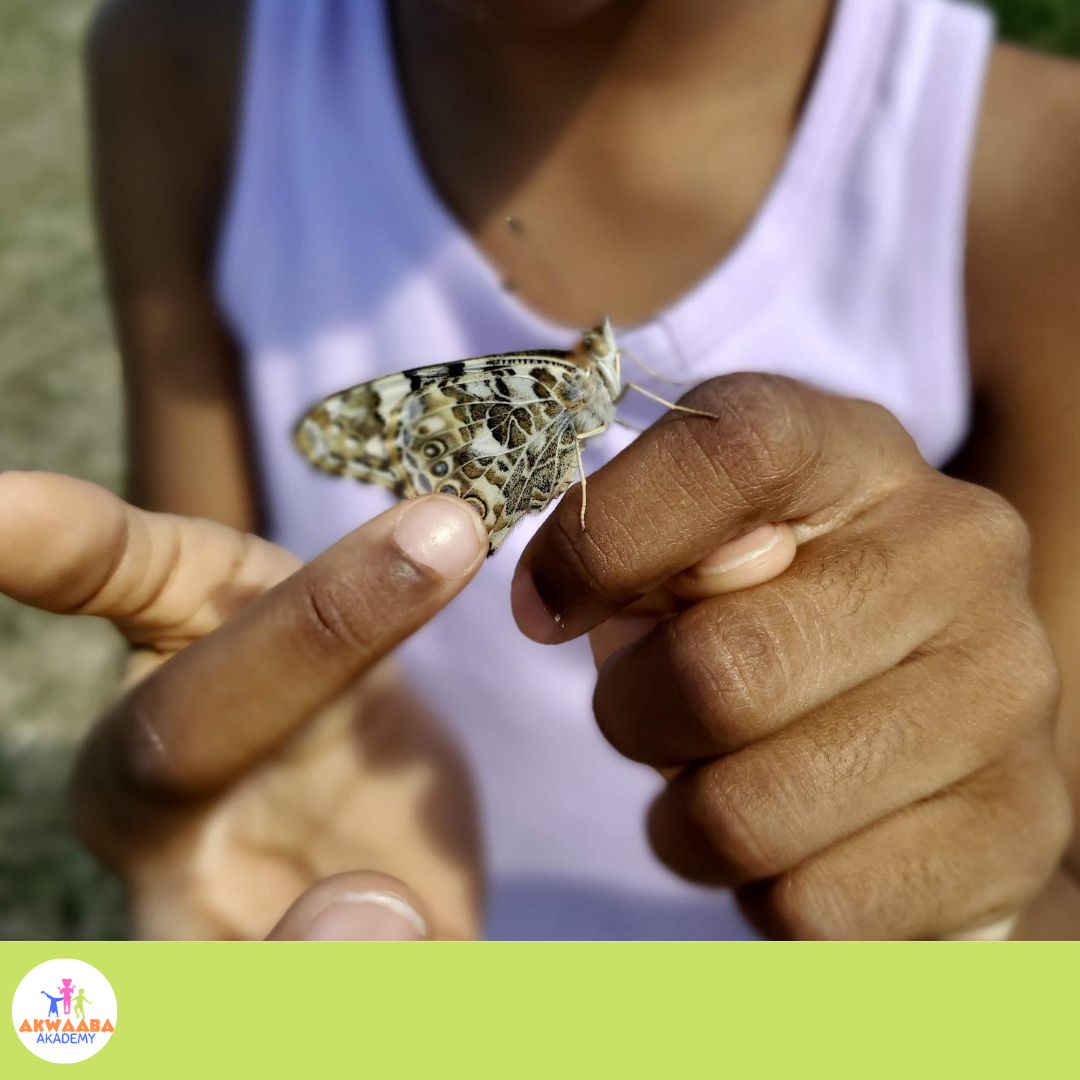
It was amazing to see how quickly the caterpillars grew in a short period of time. We closely observed and updated the journals for two weeks until the metamorphosis process was completed. My children were so excited about the process that they updated their journals without me asking. I must say, I have purchased butterfly kits for years in my Prek classes every spring, and I have never noticed the observation my daughter made. She noticed that you can see the butterfly's wings through the chrysalis (cocoon). I have never noticed that before! After her awesome observation, we used that as an indicator to let us know when the other butterflies were going to emerge. 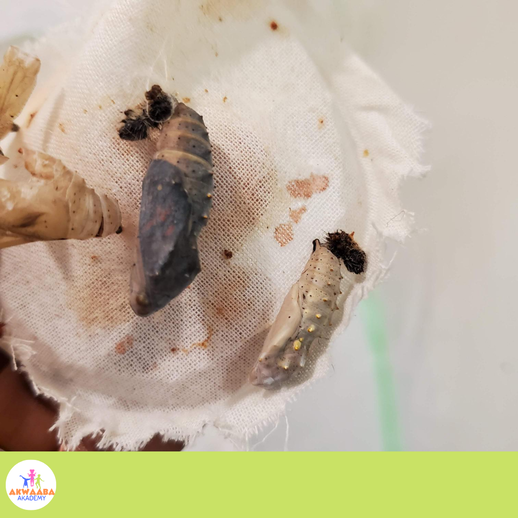 While we waited for the other butterflies to hatch, we placed orange slices in the net for the others to drink ‘nectar’. My children understood that we did not have fresh flowers in our home, so the alternative was a piece of fruit. 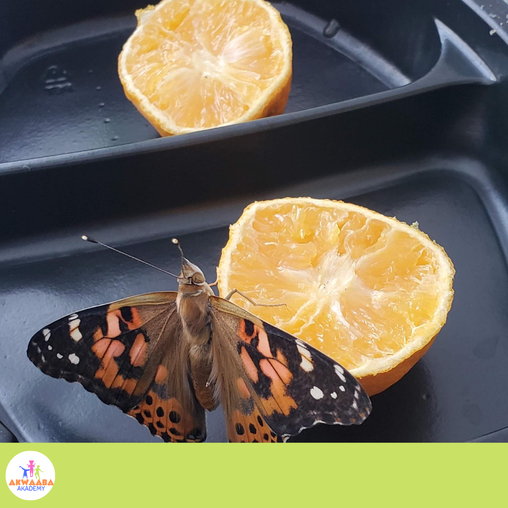 They all hatched on different days, so we waited 3 days after the last butterfly to release them. The excitement on my daughter's face about the ‘release party’ was priceless. She was very hopeful about a butterfly landing on her finger, and what do you know, a butterfly landed on her finger!
Sadly, summer will be over before you know it, but I have just the thing to cheer you up if you decide to get your own butterfly kit. Check out this freebie cut and paste worksheet.
2 Comments
I have done my fair share of uppercase and lowercase letter matches with both my children and students. The paper and pencil method of drawing a line from the uppercase letter to the correct lowercase letter, writing the matching letter, to coloring the matching letter. How many ways have you introduced letter matching to your little ones and both of you showed zero interest after a few times? I am sure you would like something new and engaging for your children. After all, learning should always be fun to lock in the learner's attention from beginning to end, right? I have just the thing for you. A DIY uppercase and lowercase letter match with 10 ways to use it. That’s right, 10 ways for preschool through kindergarten! That’s a win for everyone. You’ve probably seen this DIY before, but I went ahead and modified it in such a way that you get 10 interactive ways to use it. 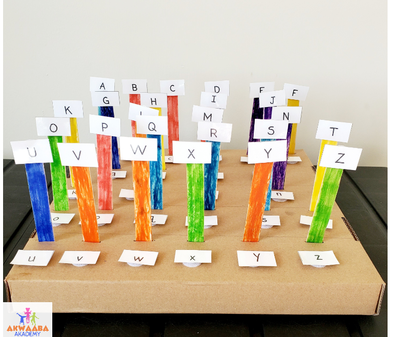 You’ll need to give yourself at least 30 minutes of prep time, but I promise you, this will keep children engaged with continued use of this activity. Materials:
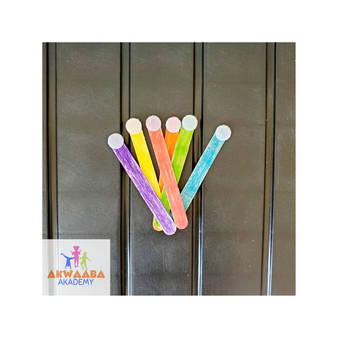
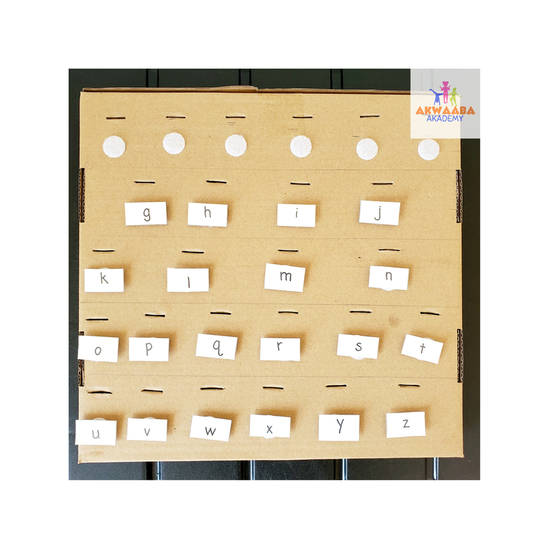
You will need a box that can accommodate a few rows for 26 craft sticks. I would highly recommend lightly tracing lines on the box to see if you will have enough space. Once your markings look fine, begin to cut your slots. 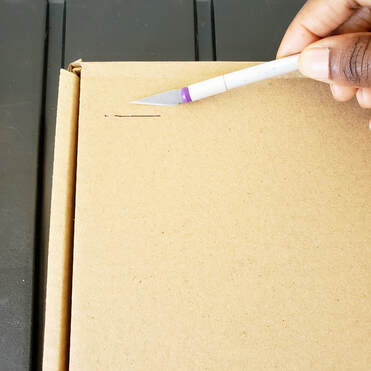 The plain sticks are suitable, but I like the pop of colors. You can purchase colored sticks, but if you’d like to have the kids involved, purchase plain sticks and let them color the sticks like I did. I even did some coloring myself. 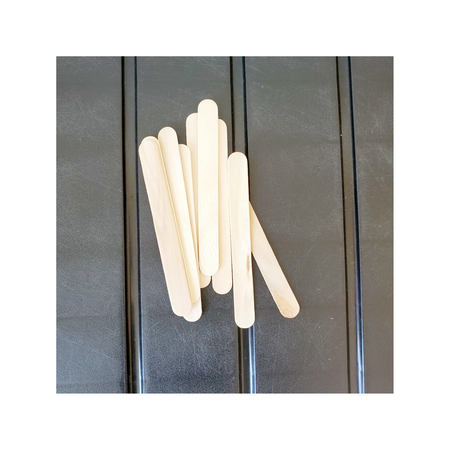 After coloring the sticks, you will need to write each letter of the alphabet on a piece of paper, preferably cardstock, but use what you have. If you want to be a little fancy like me, typing is always an option. Then laminate the sheet and cut small squares of each letter. 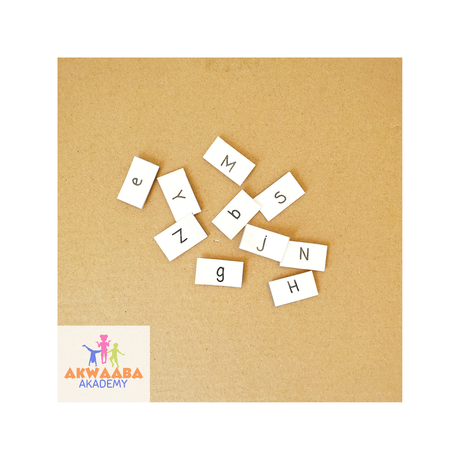 Print pictures that correspond to each letter’s beginning sound. You can always cut pictures from an old magazine or a grocery store ad. 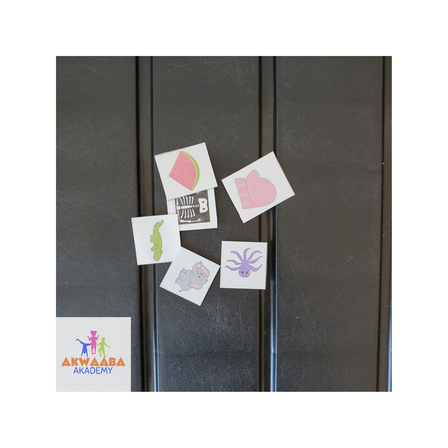 Here’s where it gets fancy…velcro! Velcro is your best friend! Put velcro on all the sticks and then velcro under each slot on the box. Be sure to pay attention to which velcro piece you are using, otherwise when it is time to use, some pieces won’t stick if it doesn’t have the correct back. I chose to use the soft side on the sticks and box. And the rough side was used on the letters and pictures.
Congratulations! You have successfully completed your DIY. Proceed to the learning phase.
I know that seems like a lot, but with 10 different ways to use your new DIY, you won't have to search Google for ideas, and your child will be engaged, learning AND targeting fine motor skills, too. In the beginning, you can work along side with your child to model and support, but after a few rounds of play, she/he can work independently. Disclosure: Some of the links are affiliate links, meaning, at no additional cost to you, I will earn a commission if you click through and make a purchase.
It is important to teach children about cultures other than their own. Far too often children have limited exposure to people of different races and cultural practices outside of home, and sometimes the schools that they attend. With everything that is happening around the nation, I thought this post would be used as a stepping stone for all, parents and educators, to have those conversations about race. As teachers, we need to go beyond the “we’re all friends in this classroom” approach, and dive into those uncomfortable conversations that will teach empathy and respect for others. Juneteenth is tomorrow, June 19, 2020. I won’t dive into a full blown history lesson, but I encourage you to take this post (and free worksheets), do your own research and have that conversation with your children and students. The history of America's Independence Day is taught, but the independence of Black Americans is forgotten. What is Juneteenth? On June 19, 1865, Union Army General Gordon Granger arrived in Galveston, Texas with news that slavery had been abolished in accordance with the Emancipation Proclamation. The people of Texas were overjoyed with their newfound freedom, so much that they wanted to celebrate. The June 19th celebration was coined “Juneteenth”. In 1997, the Juneteenth flag was added to the annual celebration. The flag was created by Ben Haith and others. The flag was redesigned in 2000, adding the original date 'June 19, 1865'. While Texans were happy to receive news about their freedom, that news was 2 ½ years late. Many southern states who were considered the Confederacy did not adhere to President Lincoln's Emancipation Proclamation that went into effect on January 1, 1863 because they wanted to continue owning slaves. Texas didn't officially recognize Juneteenth until 1979 and made it a state law through the efforts of Al Edwards, an African American state legislator. Today, there are 43 other states and the District of Colombia who recognize Juneteenth, but not as a state holiday. Recently, Virginia governor Ralph Northam announced that he is making Juneteenth a paid state holiday. A day after the Virgina announcement, Governor Andrew Cuomo of NY, said he will propose legislation next year making June 19th a permanent state holiday. I hope this post provided information about why African Americans celebrate the day all people who were enslaved became free on June 19th (Juneteenth). I have attached literacy worksheets you can use at home or school for children in grades K-2 as you teach the significance of Juneteenth. 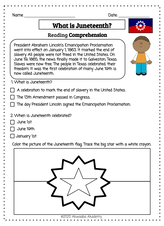
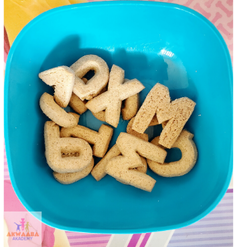 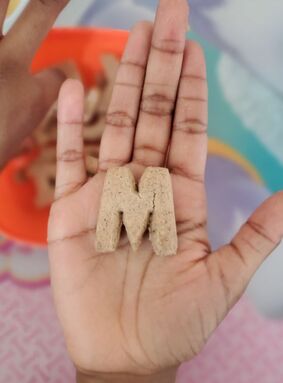 Children love snack time, so why not use that time to reinforce letter recognition or phonics? If your child is just starting out, it's still a great time to introduce letters in the 10 minutes it takes to eat a snack. Some cookies are only alphabets, but if you're lucky to find a container with letters and numbers, get those instead. Think of it as the two birds with one stone approach. My son requested cookies for a snack and as I sat with him, I began to ask him about the letters in his bowl. He was able to identify all the letters. To take it a step further, I ask him to say the the letter sound for each before eating it. There is so much you can do with alphabet cookies: Find Letters In Your Name: Ask your child to find the first letter in their name. Depending on how many letters your child is already able to identify in the alphabet, you may want them to find the remaining letters in his/her name. Keep in mind, you may or may not find all letters because you don't know which letters will land in the bowl when you pour. If all the letters just happen to be there, ask your child to arrange the letters on the table to spell out the name. Sort Letters: Some letters are formed with curvy lines and some have straight lines. Provide two bowls and model what you mean by curvy and straight lines. After sorting, ask which bowl has more cookies. To reinforce letter recognition, encourage your child to name each letter as they eat. If your container of cookies includes numbers, then ask your child to sort the cookies by letters and numbers, also continuing to identify each as they are sorted. 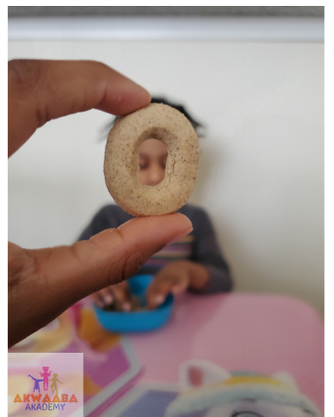  Spelling: Depending on your child's age (5+), encourage them to spell words with the cookies. This is a great way to reinforce simple sight words that he/she has already learned (at, me, to, go). My 3-year old son has been learning sight words for a few months now and he loves to put sight words together with magnetic letters or point them out in his environment any chance he gets.
I Spy With My Little Eyes Phonics Edition: Children love to play 'I Spy', so why not modify it to teach letters sounds without them even knowing they are learning. This game is perfect for children who have already shown mastery of letter recognition. Take a look at the letters in the bowl. For example, "I spy with my little eyes, a letter that says /f/". So what you do is say the letter sound and see if your child can find the F cookie. Continue with the remaining letters until all are eaten. Simple, delicious, and engaging. |
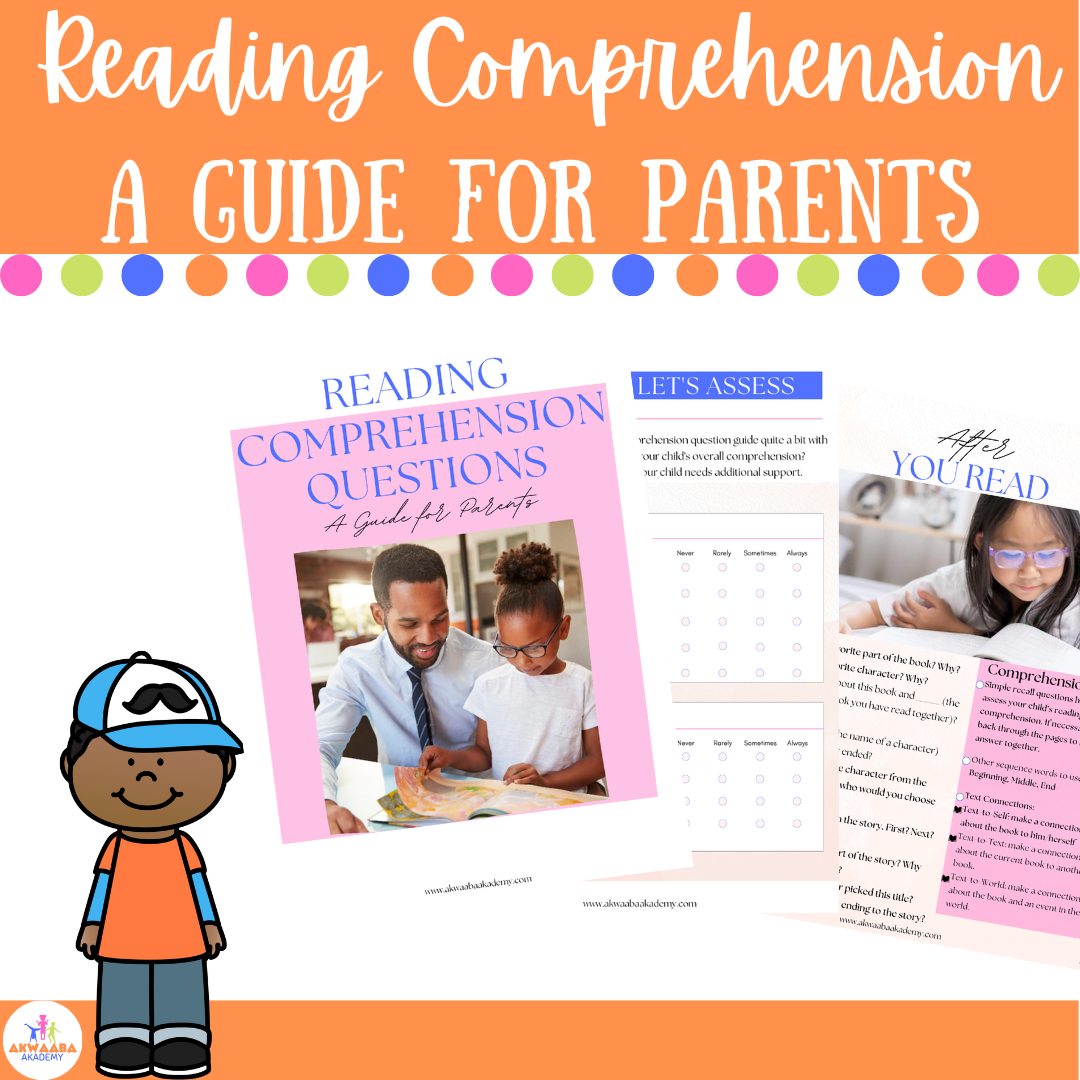
Akwaaba!Hi, I am Odessa. I'm a mom of two wonderful children and a teacher. I have a Bachelor of Arts in Early Childhood Education and a Master of Science in Childhood Education with over 10 years of PreK and Kindergarten experience. I am a lover of all things literacy for children and their curiosity of the world. Get comfy and click around my site. I hope you find something you'll like, and something your kids will love! P.S. Akwaaba means 'welcome' :) Subscribe to get our latest content by email and a FREE reading comprehension guide that supports you BEFORE, DURING, and AFTER you read a book. It also includes an assessment checklist.
Archives
July 2023
Categories |
 RSS Feed
Proudly powered by Weebly